How to Make a Fold-up Clothes Drying Rack
Week 27
This week, while researching the environmental impact of our electricity system, I learned that my clothes dryer is the second highest energy consuming appliance in my home, after the refrigerator. I found 15 ways to cut back on my electricity usage at home, one of them being to air dry my laundry. So, I asked my Dad to help me figure out a simple way to DIY a compact clothes drying rack that could easily hang on my wall and fold up out of the way.
Beyond saving electricity, this drying rack will help cut down my electricity bill and help my clothes last longer! This is a very easy and cost-effective project. I spent about $16 and was able to build and install it while six months pregnant.
What you'll need:
Materials
- 2 6ft 1x4 boards. I used common wood from Home Depot, which cost roughly $3 per board.
- 3 6ft 3/8" dowel rods
- 4 1 1/2" corner braces with screws
- 2 1 1/2" hinges with screws
- 2 #10 hooks
- 2 #210 eyes
- 2 lengths of 2ft chain
- 6 1 1/4" screws to attach frame
- 2 2" screws to attach drying rack to wall

Tools
- Drill
- 3/8" drill bit
- Phillips bit
- Pliars
- Hammer
- Sandpaper or sanding block
- Saw. Most home improvement stores will cut the boards for you, and offer the use of a hand saw for dowel rods.
-

Cut your 1x4s into two 3' pieces and three 2' pieces. Cut each dowel in half, making six 2' pieces.
-

On the wide side of one of your 3' boards, measure about 5 1/16" from one end.
-

Continue to measure and mark every 5 1/16" down the length of the board. You should have a total of six marks. This will not be a perfectly even split, but as long as your dowels are evenly spaced, it's fine.
-

Stack your 3' boards and using a 3/8" drill bit, drill holes at every mark.
-

Give everything a quick sanding, especially where you've just drilled the holes.
-

Attach the end of one 3' side board to the side of one 2' board at a 90 degree angle. The screws should go into the 2' board. This will be the bottom.
-

As you attach the boards, add your corner braces.
-

Attach the next 2' board to the other end of your 3' board. Add corner brace. This will be the top.
-

Make sure your holes align properly, then attach the other 3' side board, completing the frame. Your frame should not be wider that 2'. Add corner braces
-

Unscrew and detach the 3' board you just added, leaving the corner braces attached to the top and bottom pieces.
-

Insert a dowel into each hole. You may need to tap them with a hammer.
-

Reattach the other 3' side piece, carefully lining up each dowel and tapping into place.
-

Reattach the corner braces.
-

Line up your final 2' board with the bottom 2' frame piece and attach with hinges.
-

On your top piece, add a screw eye just inside the frame. Use pliers to tighten.
-

Add one length of chain to screw eye. You may need pliers to loosen and tighten the screw eye.
-

Repeat steps 15 and 16 on the other end of your top board.
-

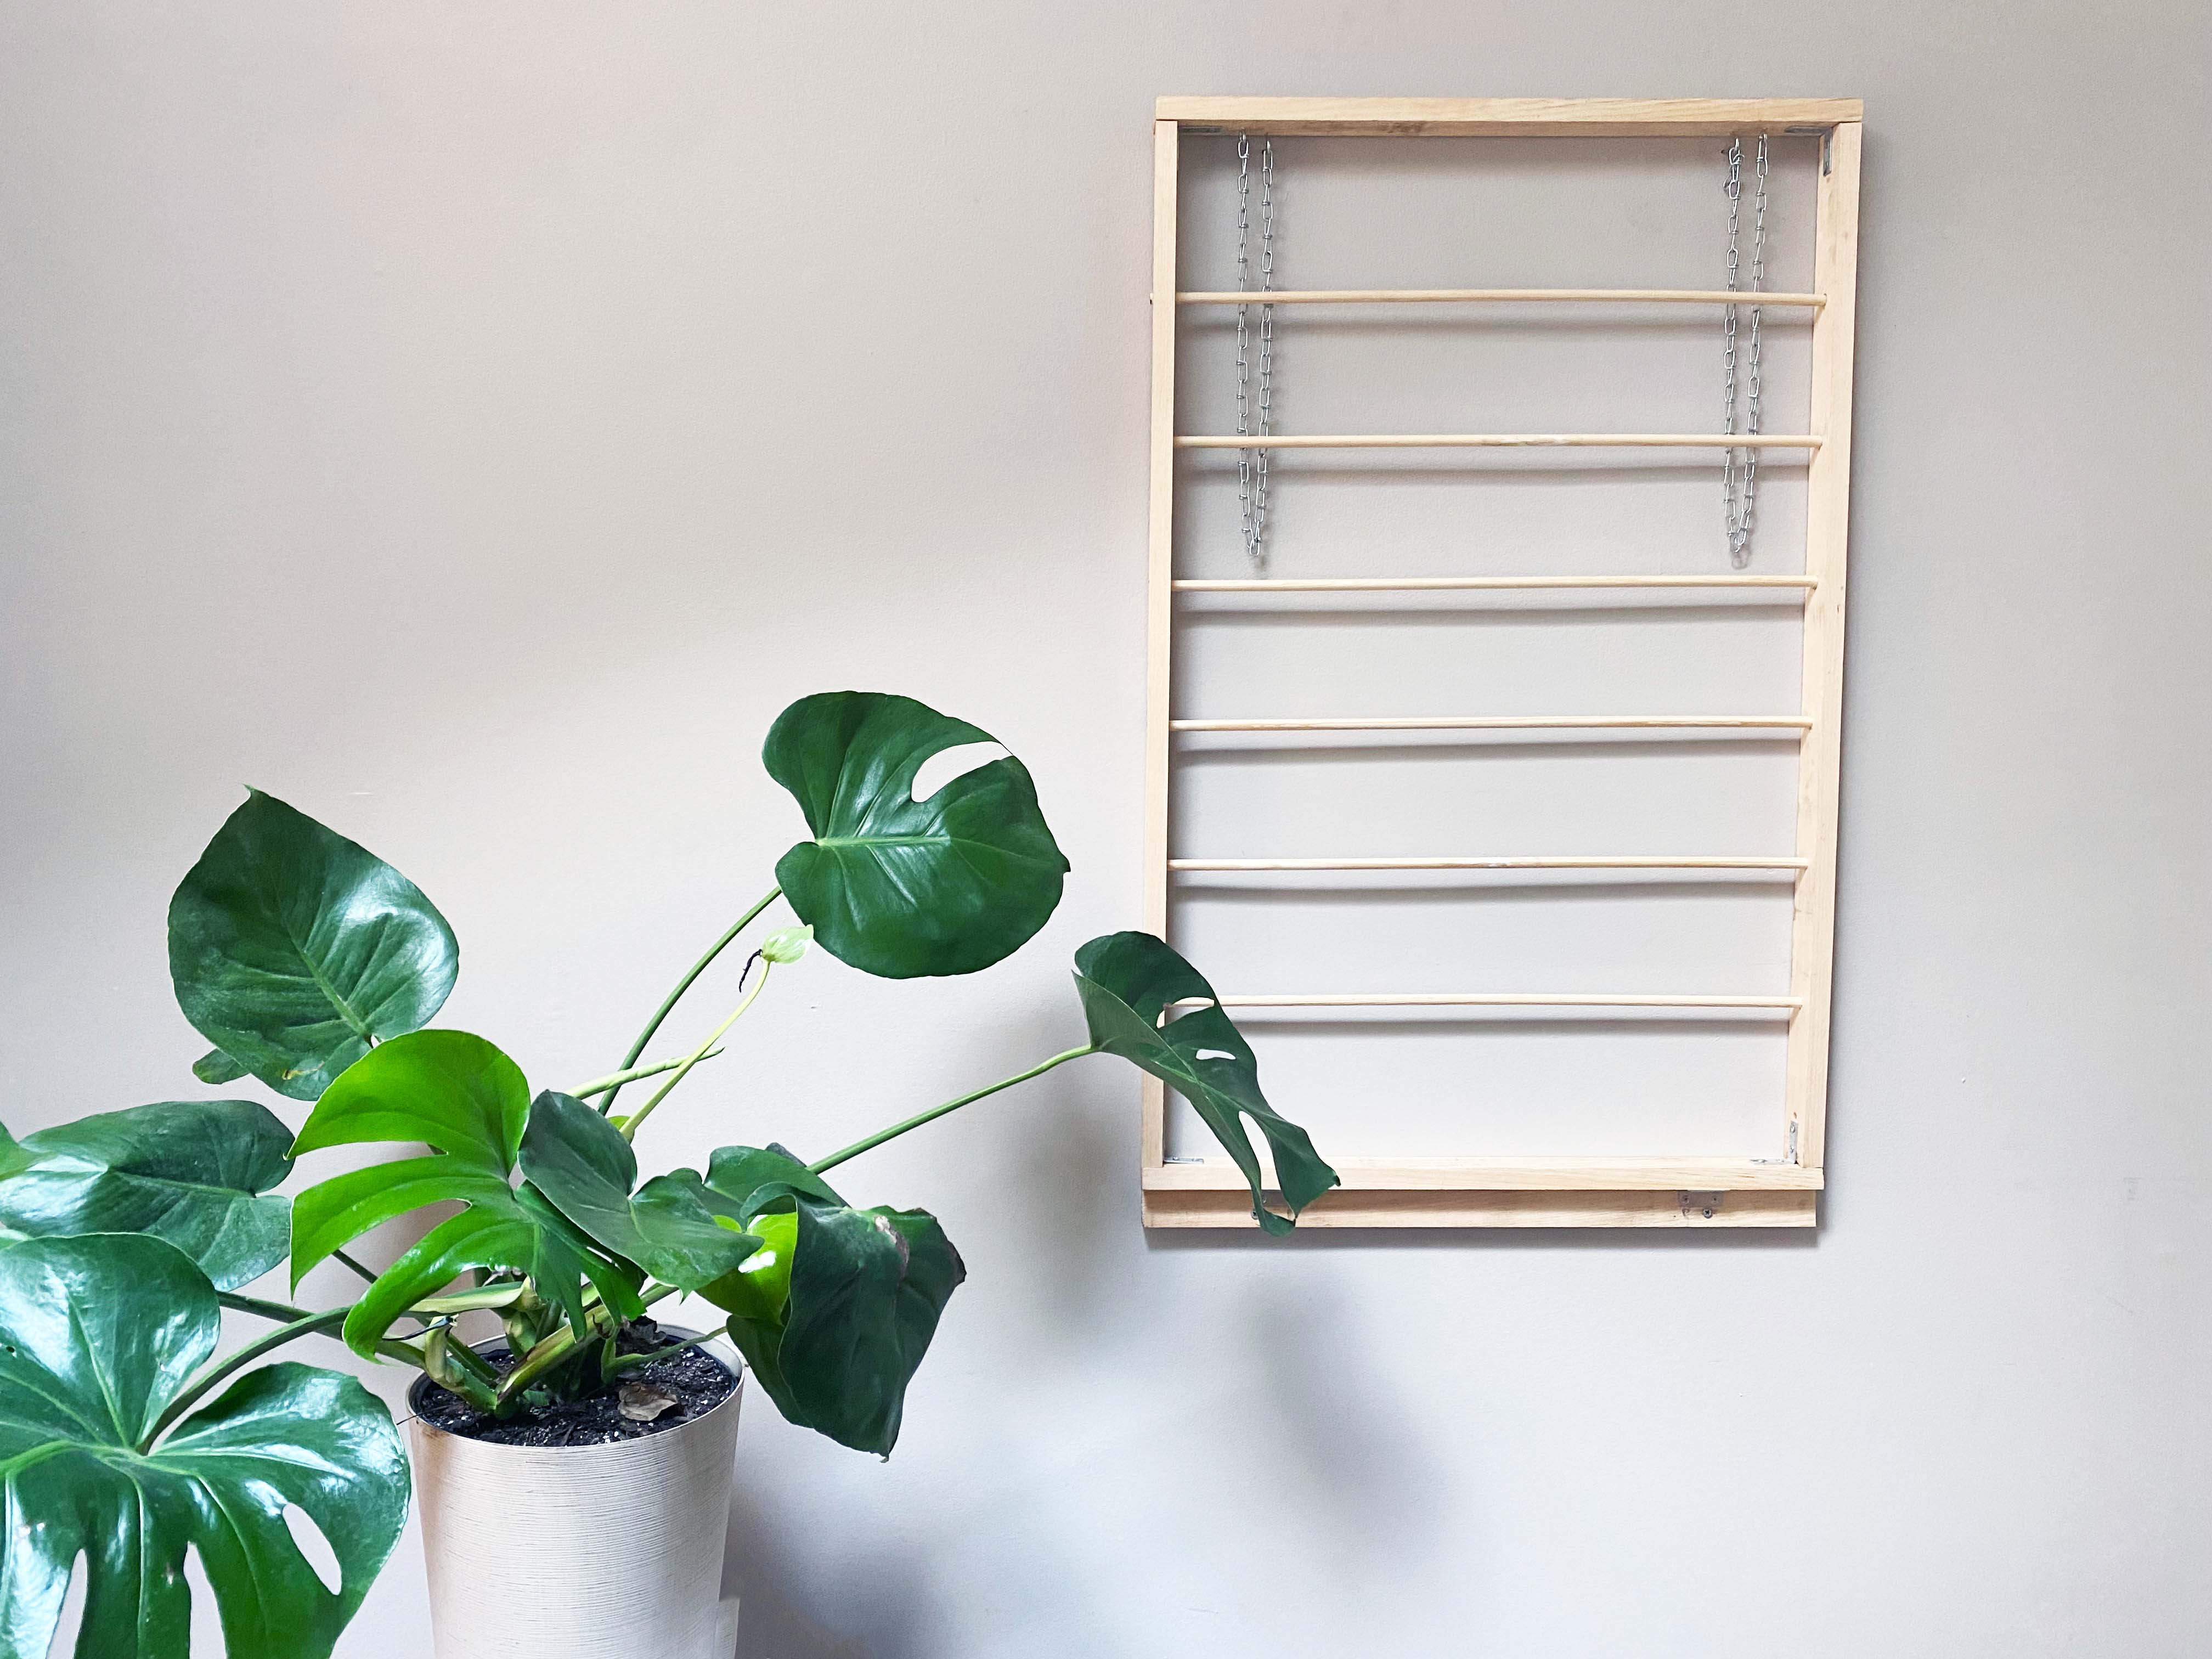
Now your drying rack is ready to be mounted. Attach your screw eyes to the wall, making sure you drill into the studs. They should be level. The top of your drying rack will rest on these screw eyes when folded up.
-

Center and rest the top of your frame on the screw hooks, then screw the bottom-most 2' panel into the wall. Again, making sure you are drilling into studs.
-

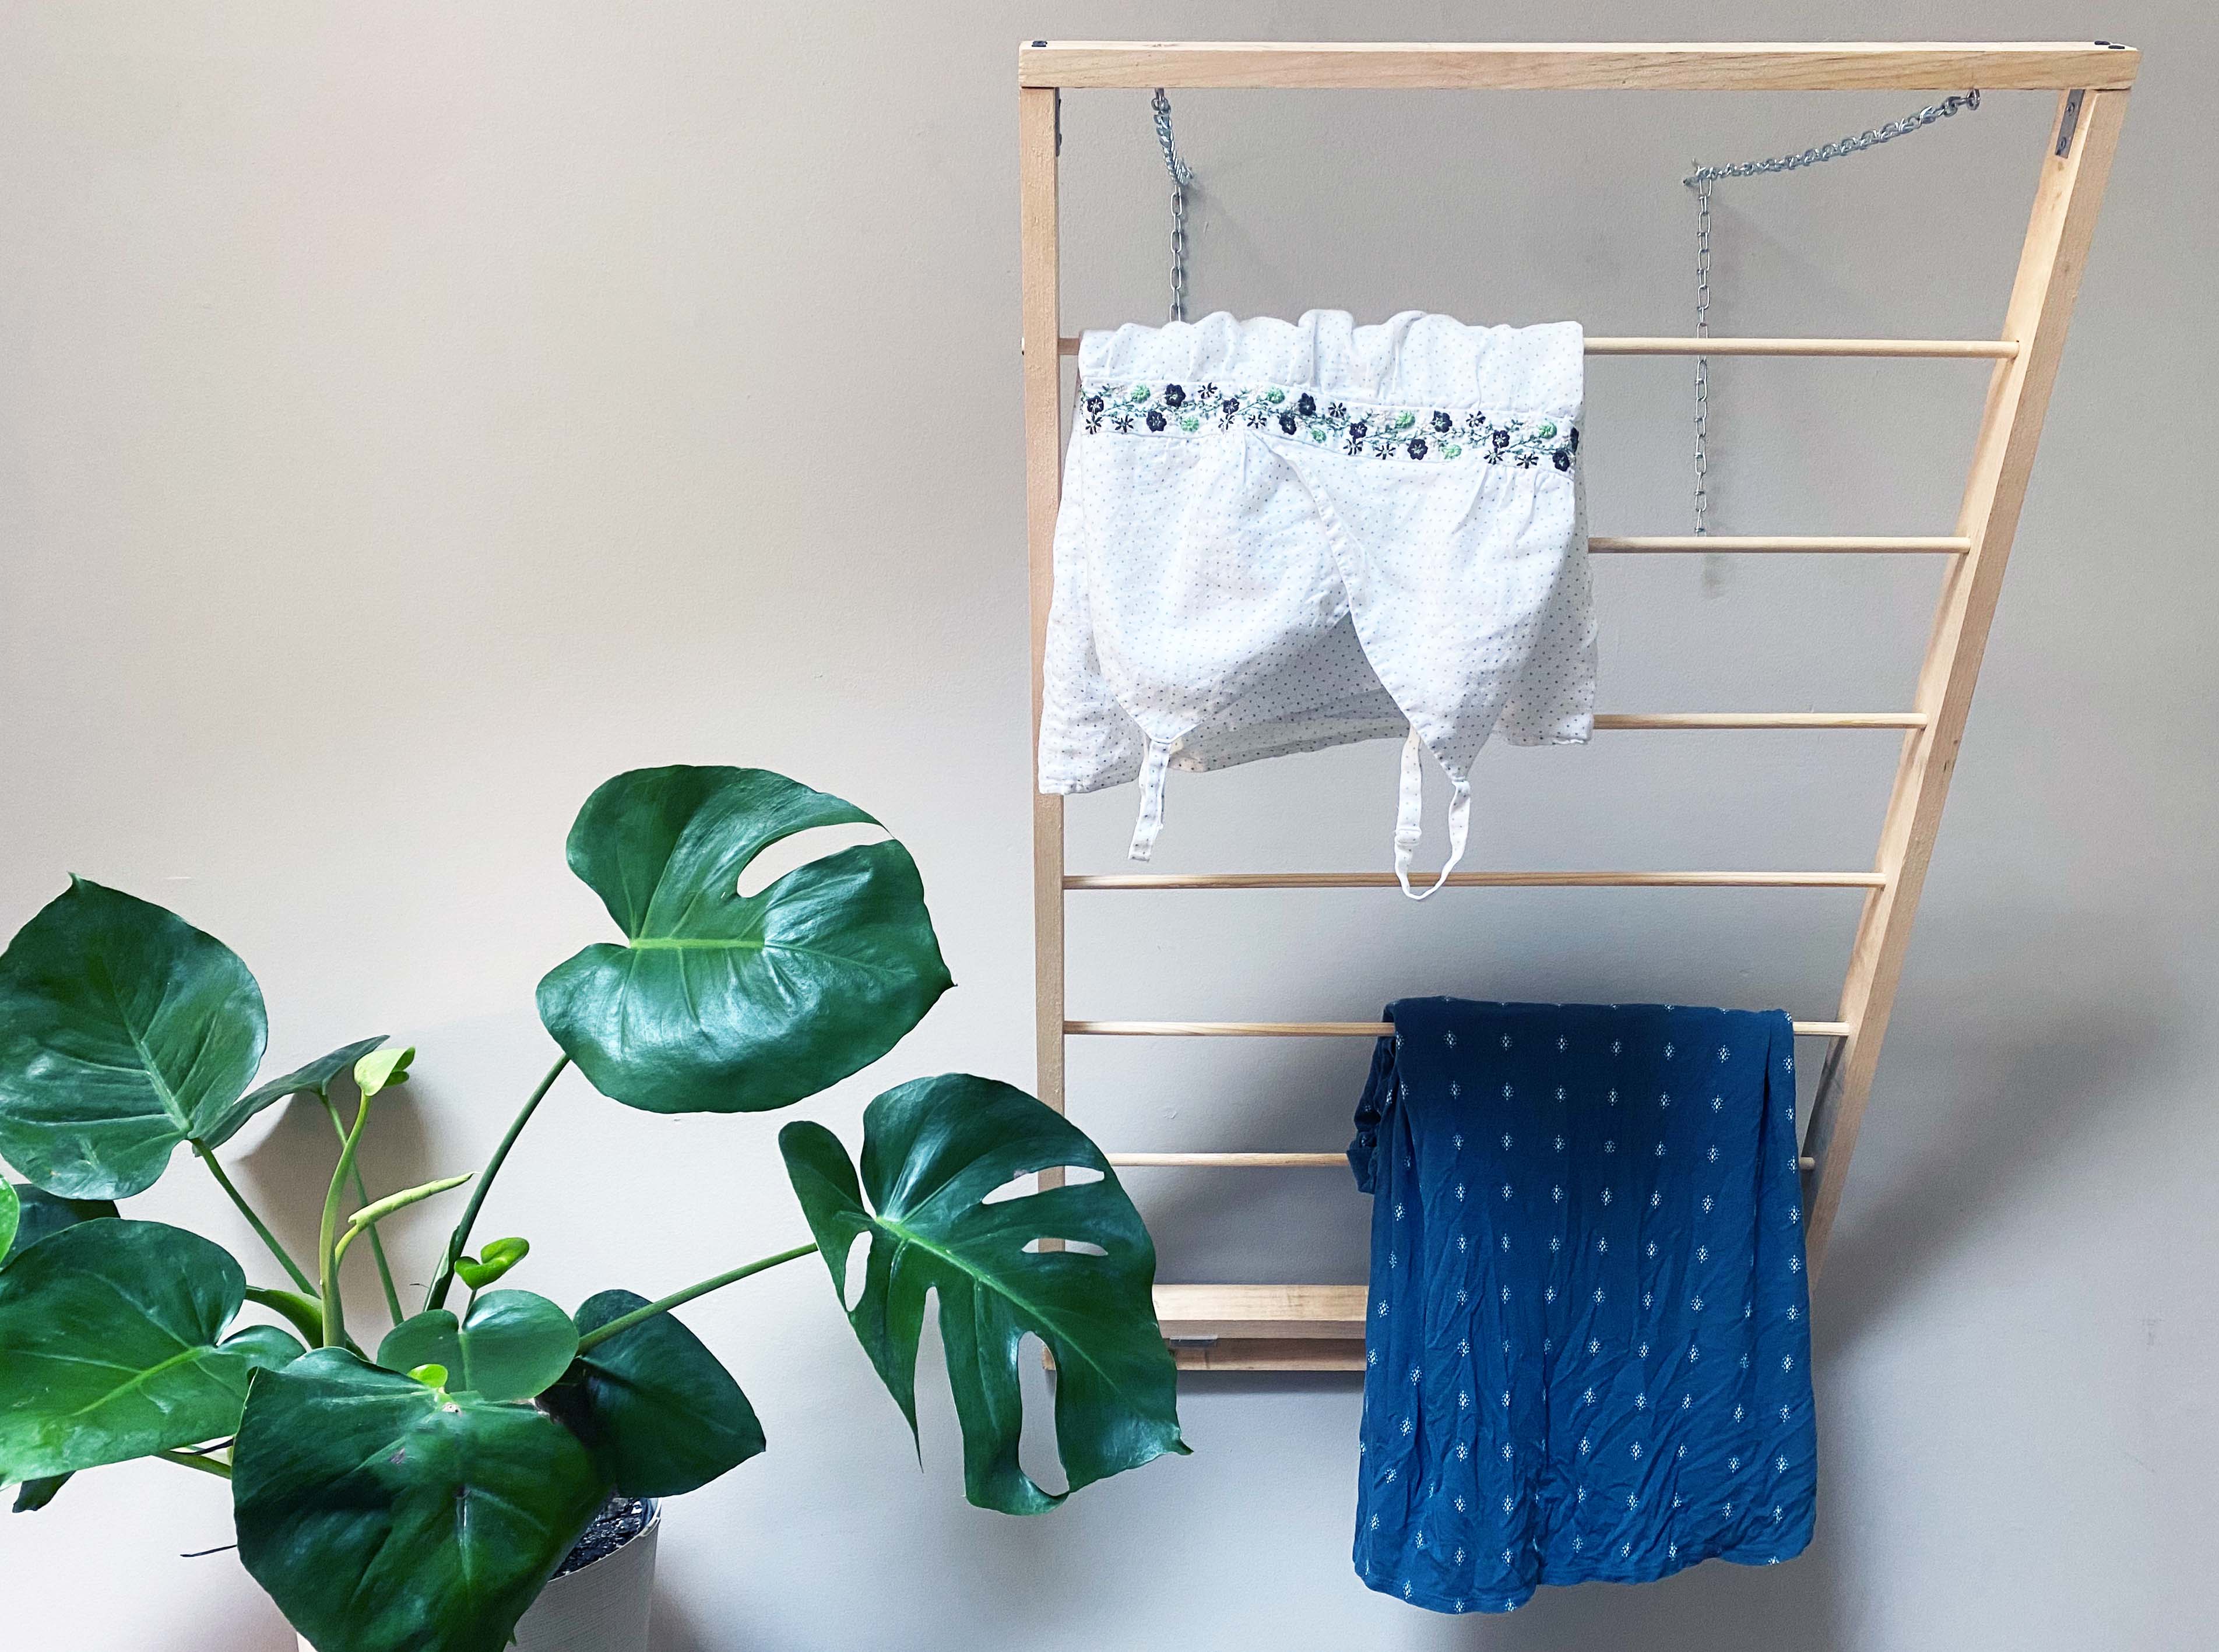
Your drying rack is now complete and can be let down at various angles by adjusting the chain.
I'm extremely pleased with how my drying rack turned out and how many garments I can hang to dry.