How to Make Your Own Reusable Water Bottle
Week 5
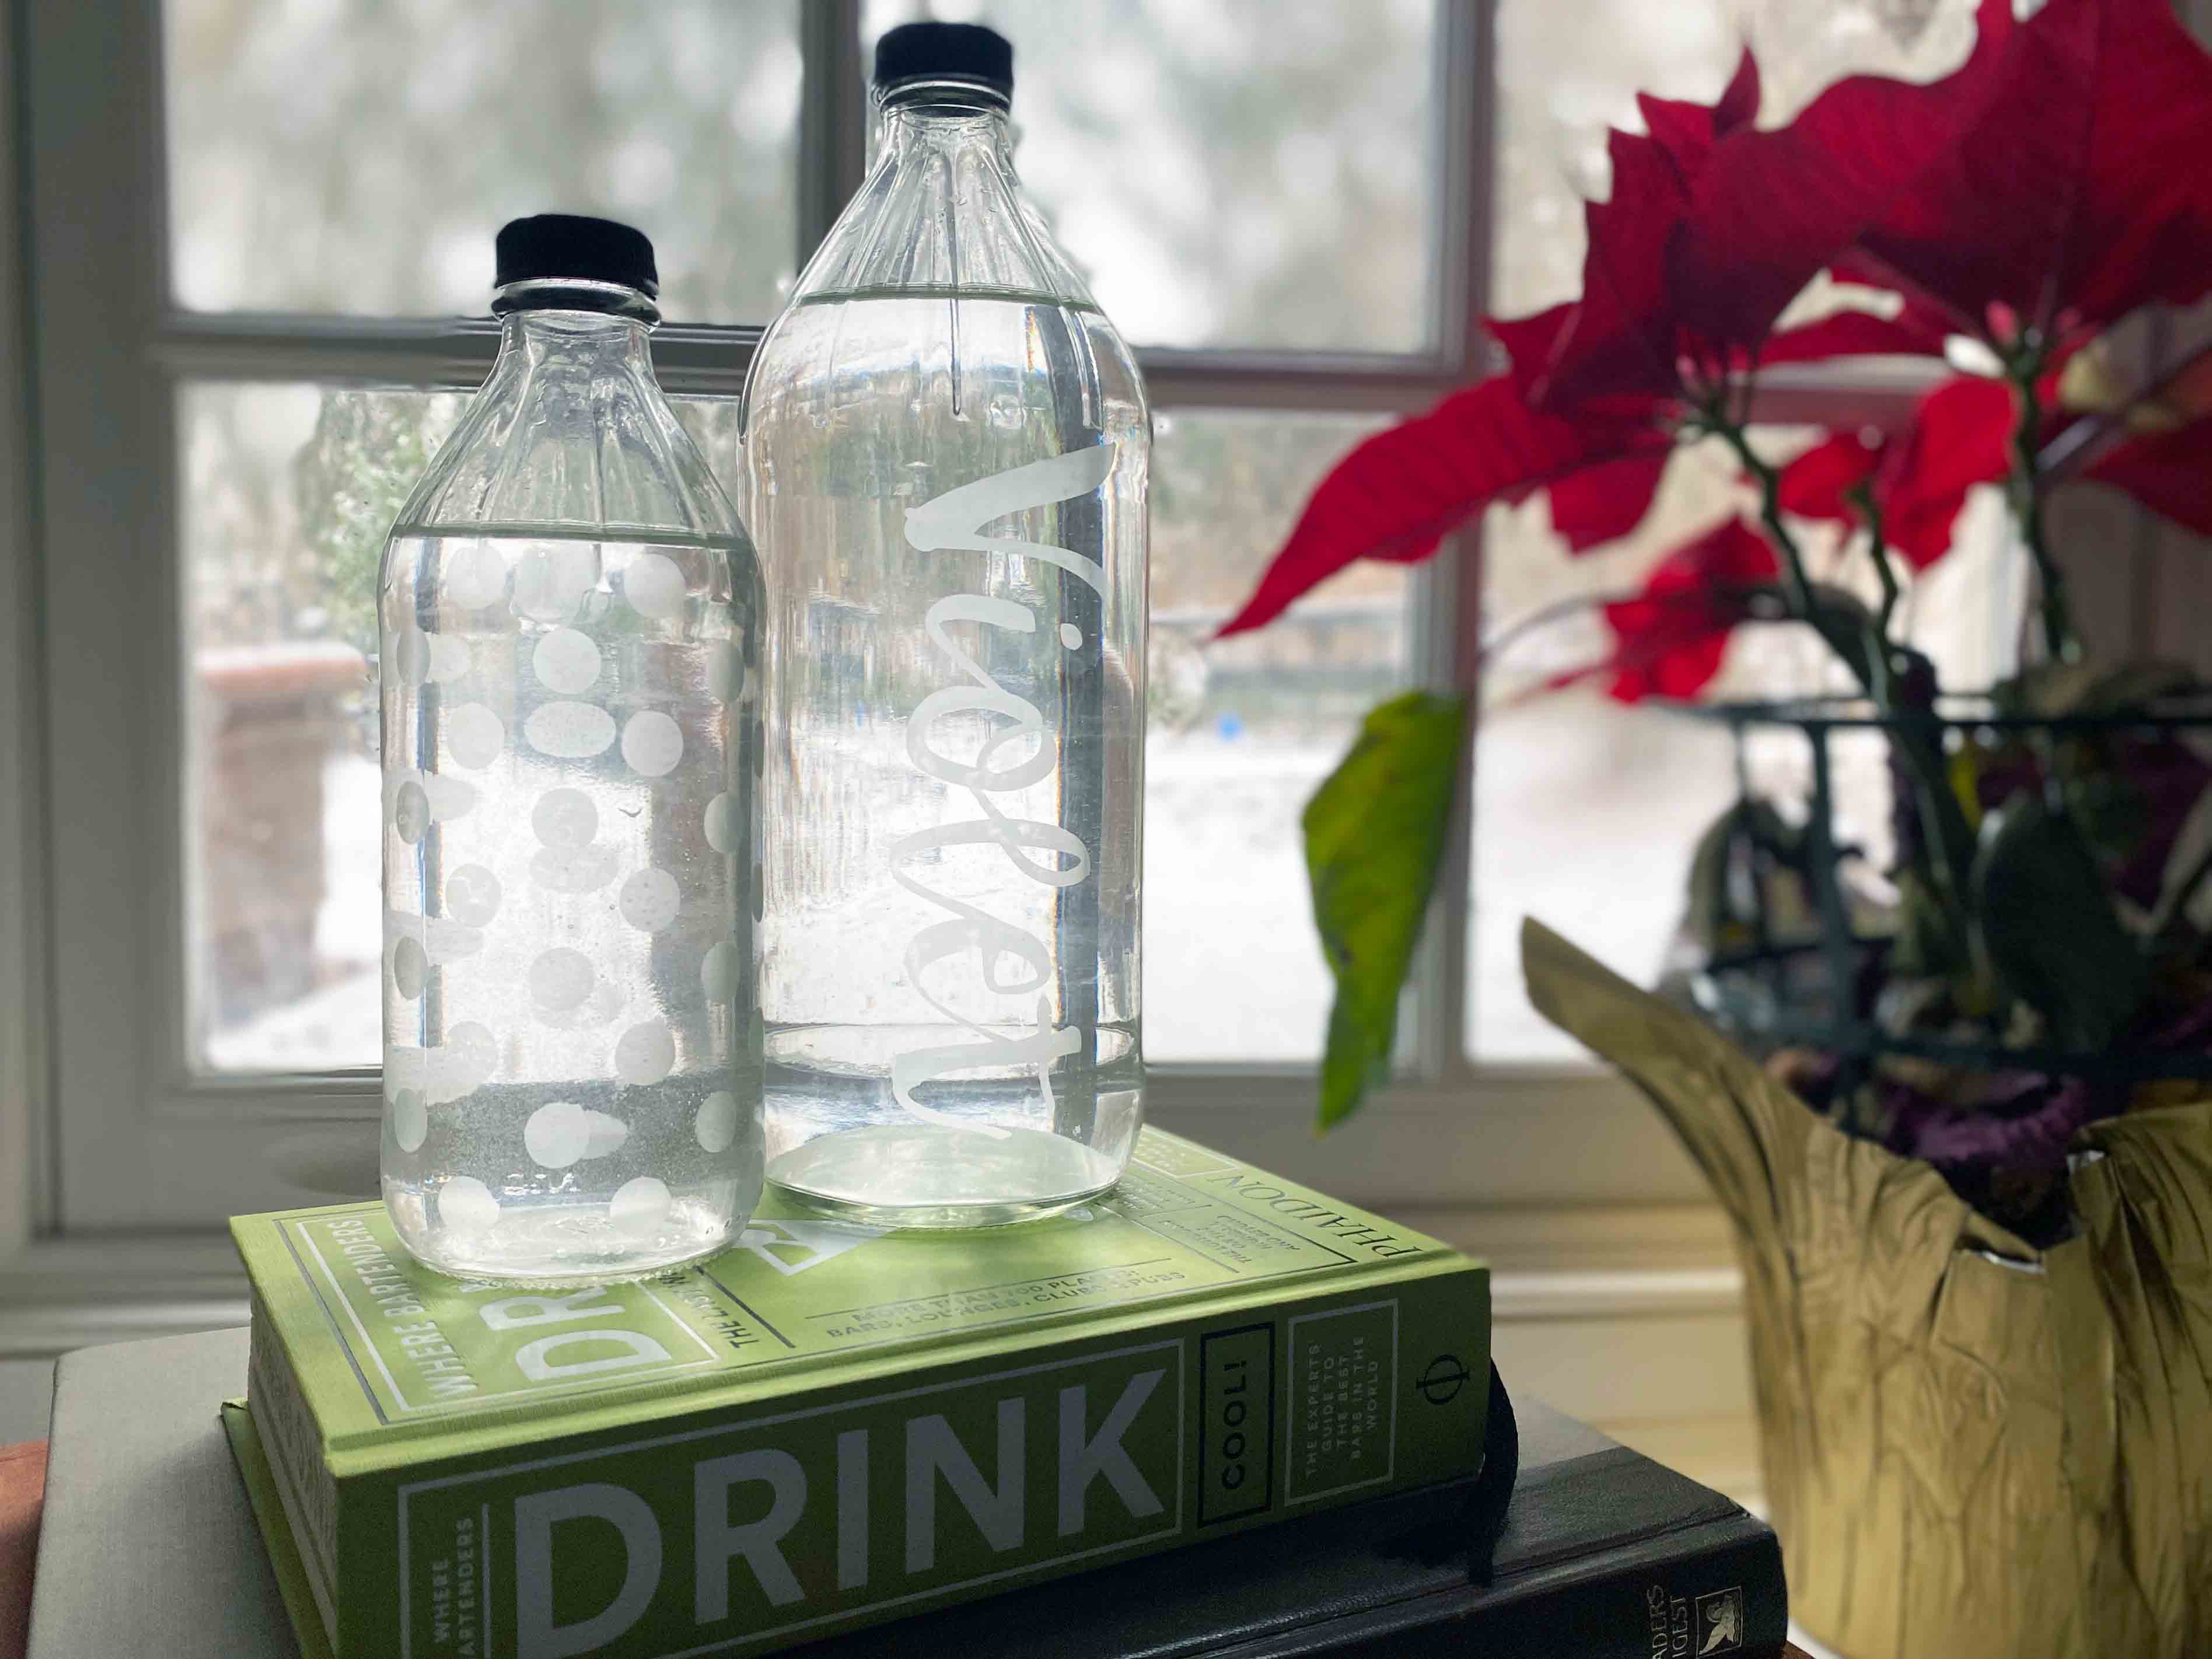
Why buy a reusable water bottle when you can make one from a glass jar or bottle you already have? In this tutorial, I'll teach you how to upcycle any glass jar or bottle by removing the label and the odor. You can stop right there or continue learning how to personalize it with a little etching.
What you'll need
To remove label and odor
- Glass Bottle - I like vinegar bottles because they have a screw on cap and nice shape.
- Pot that is big enough to fit bottle
- Baking Soda
To etch
- Cricut Vinyl Scraps, Sticker Negatives, or Masking/Painters Tape. I think this is a great opportunity to use the backs of sticker sheets and Cricut scraps that would normally be trash.
- Etching Cream - ideally from a local art supply store and not a big chain. I use Armour Etch, which does come in a plastic bottle, but a little bit goes a long way so you can do many projects with one small bottle.
- Paint Brush
- Rag to wipe away etching cream
Let's make a water bottle!
-

Grab a glass bottle. I like this vinegar bottle because is has a screw on cap and similar shape to plastic water bottles.
-

First, we'll remove the label. Get a large pot of water simmering and pour in a little baking soda.
-

Put your glass bottle in the pot of hot water, fully submerging the label. You may need to add a little water to the bottle to weigh it down. Within a few minutes, the label will fall off. Pull the bottle out and dry it off.
-

Now, let's take care of any remaining odors. Add water and a spoonful of baking soda to your bottle and shake, shake, shake it for about a minute. If your bottle still stinks, repeat this step and shake a little longer.
-

Find Cricut scraps or unused sticker sheets that can make a design on your bottle. Painters and masking tape will also work for clean edges.
-

Make sure your bottle is dry and place your stickers or tape on the bottle. Note that the exposed area will be the design left behind. Push down all sticker edges to keep etching cream from creeping beyond the desired area.
-

Apply etching cream to all of the areas you would like to see etched. Do not get this on your skin or in your eyes, as it can badly irritate or even burn them. Use gloves and goggles to protect yourself.
-

Once all desired areas have received the etching cream. Let set for five minutes. Any less and it may not etch completely. Any more and the stencil may begin to wear out.
-

After 5 minutes, rinse the etching cream off of the bottle.
-

Use an old wet rag to wipe away any remaining etching cream.
-

Remove the stickers and tape from your bottle.
-

Show your friends and family how easy it is to make a personalized reusable water bottle.